The best 5 free alternatives to microsoft’s paint: Microsoft Paint has been a staple for many users when it comes to basic image editing and drawing. However, if you’re looking to explore more advanced features or simply want a change, there are several excellent free alternatives available.
Key Takeaways:
- Try free MS paint alternatives for more creative possibilities.
- Unleash your artistic side with easy-to-use tools like GIMP, Krita, Paint.NET, MediBang Paint, and Inkscape.
- Whether you’re a beginner or advanced user, find options with user-friendly interfaces like Paint.NET or specialized features like MediBang Paint.
- Experience professional-grade editing without the cost using GIMP and Inkscape.
- With cloud integration in MediBang Paint, create and access your projects seamlessly across devices.
the best 5 free alternatives to microsoft’s paint
In this article, we’ll explore the top 5 FREE alternatives to Microsoft Paint that offer a range of features to enhance your creativity.
1. GIMP (GNU Image Manipulation Program)
- Advanced raster graphics editor.
- Supports layers, masks, and filters.
- Extensive range of brushes.
- Open-source and customizable.
- Suitable for users seeking professional-level editing capabilities.
GIMP is a powerful and open-source raster graphics editor that rivals many professional paid software. It provides advanced features such as layers, masks, filters, and a variety of brushes, making it an excellent choice for users who want to take their digital art to the next level.

GIMP’s user interface might seem a bit overwhelming at first, but there are plenty of tutorials available to help you master its capabilities.
Whether you’re creating gradients, drawing lines, or adding intricate details, understanding the brush tool is crucial.
Step 1: Open a New Canvas
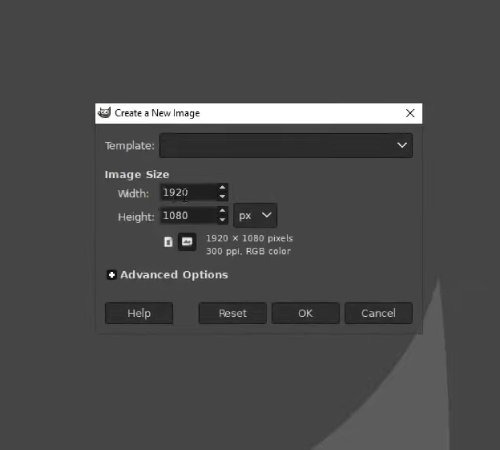
- Create a new canvas with dimensions 1920×1080. This is a standard size for various projects.
- Fill the canvas with a darker color to make it easier to see the brush strokes.
Step 2: Select the Brush Tool
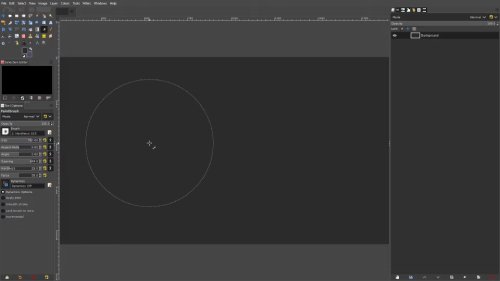
- Locate the brush tool on the toolbar (shortcut: P).
- Familiarize yourself with the default brushes provided.
Step 3: Brush Types
- Explore the default brushes: softest, next softest, next hardest, and hardest.
- Experiment with each brush type to understand their characteristics.
Step 4: Using Soft Brushes for Gradients
- Choose the softest brush for creating smooth gradients.
- Create a new layer and click multiple times to build a soft gradient.
- Adjust the opacity to control the intensity of the gradient.
Step 5: Using Hard Brushes for Lines
- Opt for a harder brush when creating defined lines.
- Draw lines or shapes using the hard brush for precise strokes.
- Experiment with different brush sizes for versatility.
Step 6: Understanding Spacing
- Pay attention to the spacing option in the brush settings.
- Adjust spacing to control the distance between brush strokes.
- Experiment with different spacing values for varied effects.
Step 7: Exploring Aspect Ratio and Angle

- Utilize aspect ratio to change the shape of the brush (e.g., create lens flare effects).
- Adjust the angle to change the orientation of the brush.
Step 8: Force and Hardness
- Experiment with force to control the pressure sensitivity of the brush.
- Understand hardness to determine how sharp or soft the brush edges appear.
- Use the soft brush with varied hardness for smoother edges.
Step 9: Smooth Stroke
- Explore the smooth stroke option to create smoother lines.
- Adjust quality for reduced jaggedness and weight for lagging effects.
- Useful when drawing with a mouse for a more polished look.
2. Krita
- Digital painting application.
- Intuitive user interface.
- Tailored brushes and tools for artists.
- Supports high-quality graphics tablets.
- Ideal for sketching, painting, and concept art.
Krita is a digital painting application designed for artists, illustrators, and concept designers. It offers an intuitive user interface with a variety of brushes and tools specifically tailored for digital artists.

Krita supports high-quality graphics tablets, allowing for precise and detailed work. Whether you’re into sketching, painting, or concept art, Krita is a fantastic free alternative that continues to gain popularity in the digital art community.
It’s an excellent option for beginners who want a powerful digital art tool without breaking the bank.
Creating Your Canvas
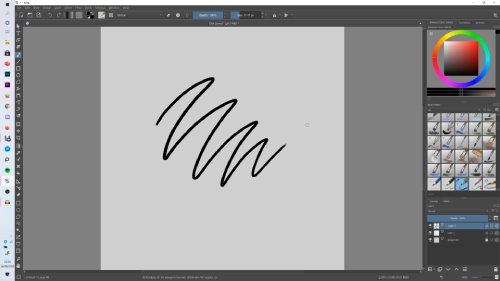
- Open Krita and click on “New File” to create your canvas.
- Adjust the canvas dimensions based on your preference (e.g., 2000 to 3000 pixels).
- Consider your computer’s capabilities when choosing canvas size.
- Set the resolution to 300 pixels per inch (ppi) for high-quality images.
- Customize the background color and other settings under the content tab.
- Click “Create” to finalize your canvas.
Fixing Brush Lag
- If you encounter brush lag, go to Settings > Configure Krita > Display.
- Change canvas graphics acceleration from OpenGL to Direct3d via Angle.
- Experiment with scaling mode and canvas size to reduce lag.
- Troubleshoot other factors causing lag, such as too many layers.
Finding Missing Brushes
- If brushes are missing after an update, go to Settings > Manage Resources.
- Move the previous version’s default resources to active bundles to restore missing brushes.
Shortcuts and Canvas Navigation
- Use [m] to mirror the canvas for better perspective on proportions.
- Rotate the canvas using [4] and [6], holding [shift] and [space] for more control.
- Zoom in/out with [+] and [-], reset zoom with [1], fit to page with [2], and page width with [3].
- Resize the brush by dragging or holding [shift] while dragging.
- Color pick by holding [ctrl] and clicking on the desired color.
My Favorite Brushes
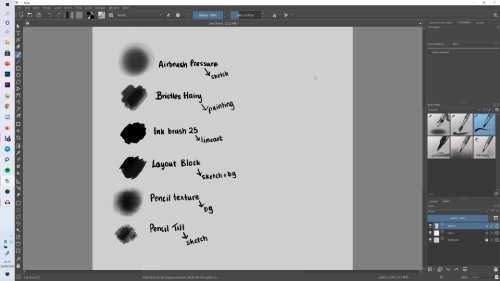
- Create a tag named ‘favourites’ to organize preferred brushes.
- Experiment with various brushes to discover your favorites.
- Use the ‘airbrush pressure,’ ‘bristles hairy,’ ‘ink brush 25,’ ‘layout block,’ ‘pencil texture,’ and ‘pencil tilt’ for different purposes.
Step One: Messy Sketch
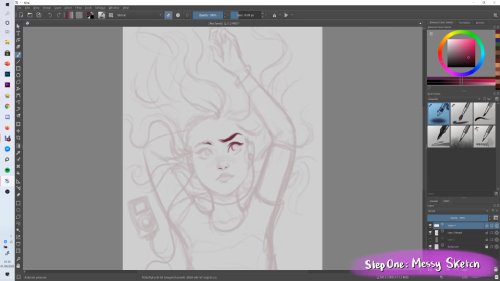
- Start with a rough, messy sketch using the airbrush tool.
- Focus on basic ideas and anatomy without worrying about perfection.
- Lower the opacity of the initial sketch and create a new layer for a refined sketch.
Step Two: Refined Sketch
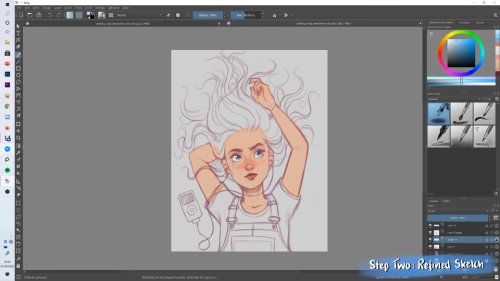
- Refine the sketch on the new layer, adding more details and clarity.
- Decide whether to add even more refinement or proceed without line art, depending on your preference.
Step Three: Flat Colors
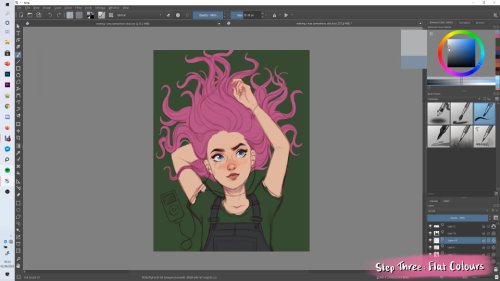
- Block in flat colors on a layer beneath the sketches.
- Experiment with different colors and make creative decisions.
Step Four: Shadows and Highlights
- Use multiply layers for shadows and luminosity layers for highlights.
- Utilize clipping layers to ensure precise shading without going beyond defined boundaries.
Step Five: Blending
- Merge all layers using [ctrl]+[e] and begin blending.
- Use the ‘bristles hairy’ brush with pressure sensitivity for detailed areas.
- Disable size pressure opacity control for smoother blending.
- Continuously color pick ([ctrl]) and adjust opacity for seamless blending.
General Tips
- Plan your digital painting with sketchy thumbnails to experiment with lighting and composition.
- Mirror your canvas frequently to check and correct proportions.
- Take breaks during long painting sessions to maintain a fresh perspective and avoid burnout.
3. Paint.NET
- User-friendly raster graphics editor.
- Supports layers and special effects.
- Wide range of plugins for customization.
- Strikes a balance between simplicity and functionality.
- Suitable for users seeking a more powerful alternative to Microsoft Paint.
Paint.NET is a user-friendly raster graphics editor that strikes a balance between simplicity and functionality. It is an excellent choice for users who want something more powerful than Microsoft Paint but find GIMP a bit too complex.

Paint.NET supports layers, special effects, and a wide range of plugins, allowing users to customize their experience based on their needs.
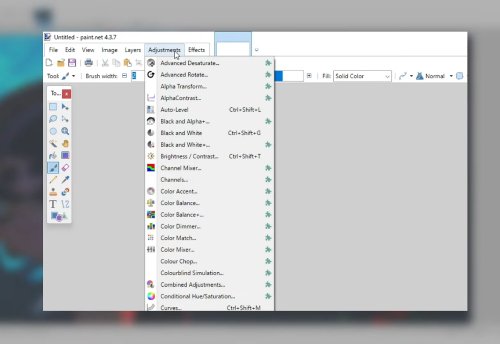
The straightforward interface makes it easy for beginners to get started while offering enough features for more advanced users.
4. MediBang Paint
- Versatile digital painting and comic creation tool.
- Variety of brushes, fonts, and backgrounds.
- Cloud integration for cross-device collaboration.
- Ideal for manga and comic art.
- Suitable for artists of all levels.
MediBang Paint is a versatile and feature-rich digital painting and comic creation application. It’s suitable for artists of all levels, offering a variety of brushes, fonts, and pre-made backgrounds.
One notable feature is its cloud integration, allowing users to seamlessly work on their projects across different devices.

If you’re into manga or comic art, MediBang Paint is an excellent choice with its dedicated tools for creating stunning visual narratives.
5. Inkscape
- Powerful vector graphics editor.
- Ideal for scalable graphics.
- Features object manipulation and layers.
- Suitable for logo design, illustration, and graphic design.
- Robust set of tools for working with shapes and text.
While not a traditional image editing tool, Inkscape is a powerful vector graphics editor. It’s an excellent choice for users who want to create scalable graphics or work on projects that involve a lot of text and shapes.

Inkscape is particularly useful for tasks like logo design, illustration, and graphic design. Its robust set of features includes object manipulation, layers, and the ability to export to various file formats.
Conclusion
Say goodbye to the limitations of Microsoft Paint and explore the vast world of free alternatives that cater to different creative needs.
Whether you’re an aspiring artist, graphic designer, or just someone looking for more features in your image editing tool, these five alternatives offer a range of capabilities to bring your ideas to life.
Download one, give it a try, and unlock a new level of creativity without breaking the bank.